When it comes to birthday parties, there are some food traditions that stand the test of time. Others less so.
#1 and #2 teenage sons are a bit beyond the 'party games + birthday tea' formula, but at the ripe old age of 9, we've still got one (maybe two) traditional parties left for Hella before my little girl is practically a teenager.
Around our birthday party tea table there's often -
- Crisps
- Cadbury's Chocolate Finger Biscuits
- Cupcakes - maybe these Chocolate Cupcakes or these Chocolate and Caramel Cupcakes
- Iced gingerbread biscuits - like these super cute hearts.
There are rarely many sandwiches - my theory on sandwiches at a birthday party goes like this - cut out the middle man ... make the sandwiches and put them straight in the bin.
But there's ALWAYS -
- A birthday cake - probably chocolate and almost always with my signature style of decoration
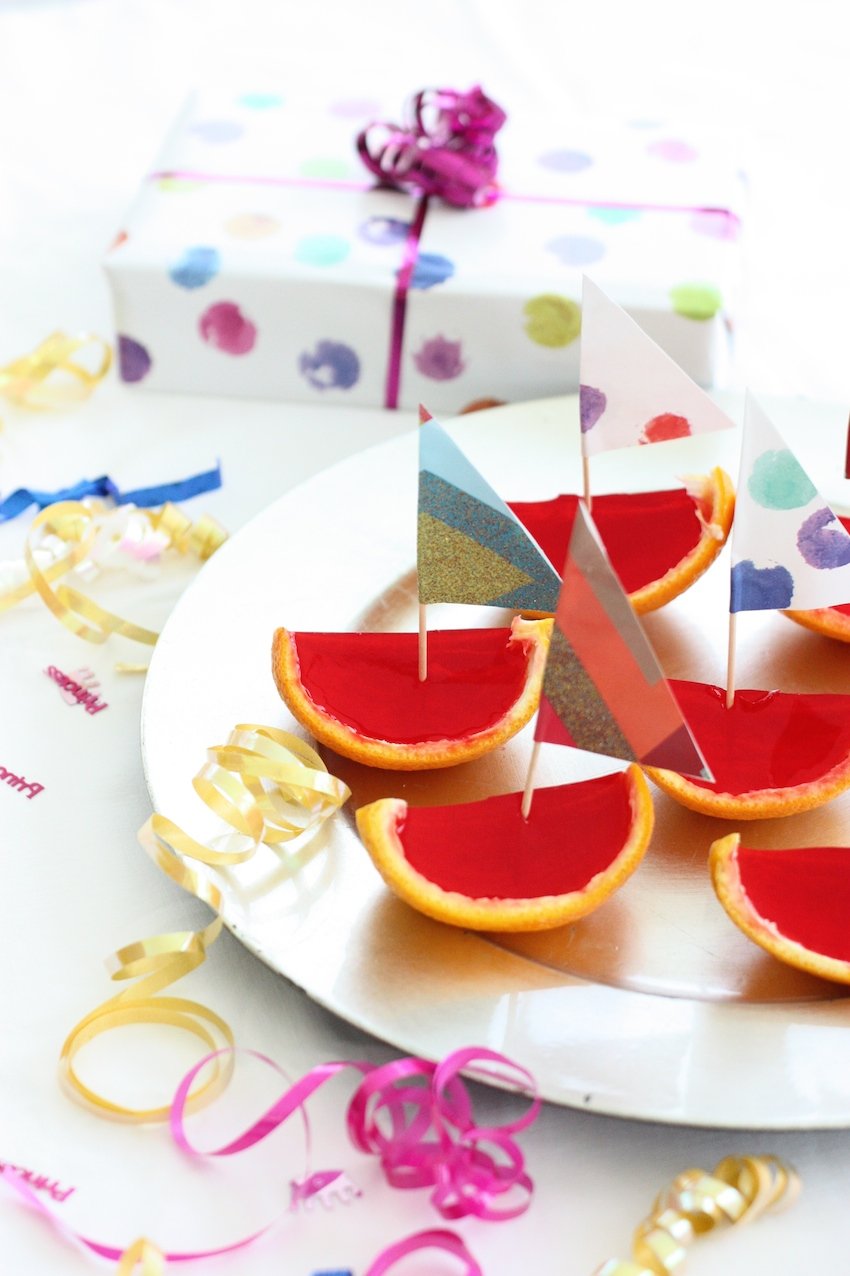
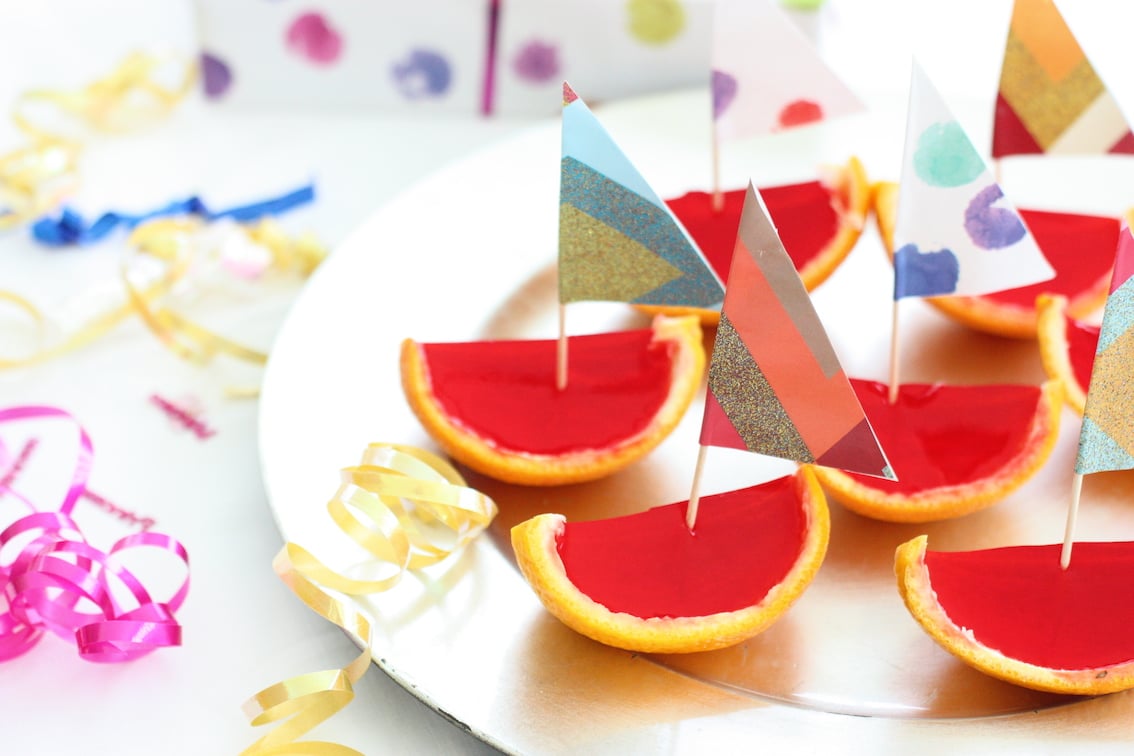
- Jelly Boats - sigh ... jelly boats ... the stuff of legends.
I first made these Jelly Boats in 2007, our last year of birthdays in England before we moved to Dubai. #2 teenage son was turning 5 and it was a village hall party with lots of energetic 'let's get them really exhausted' games, followed by a story with dressed up characters and then the party tea. So let's skip to the main event - those Jelly Boats. It was their first voyage and oh what a voyage. Forget the sandwiches (of course), ignore the crisps, push the cakes to one side - the Jelly Boats were where it was at. Some children loved them to an obsessive degree but everyone loved them to some degree. And they just keep coming back - year after year.
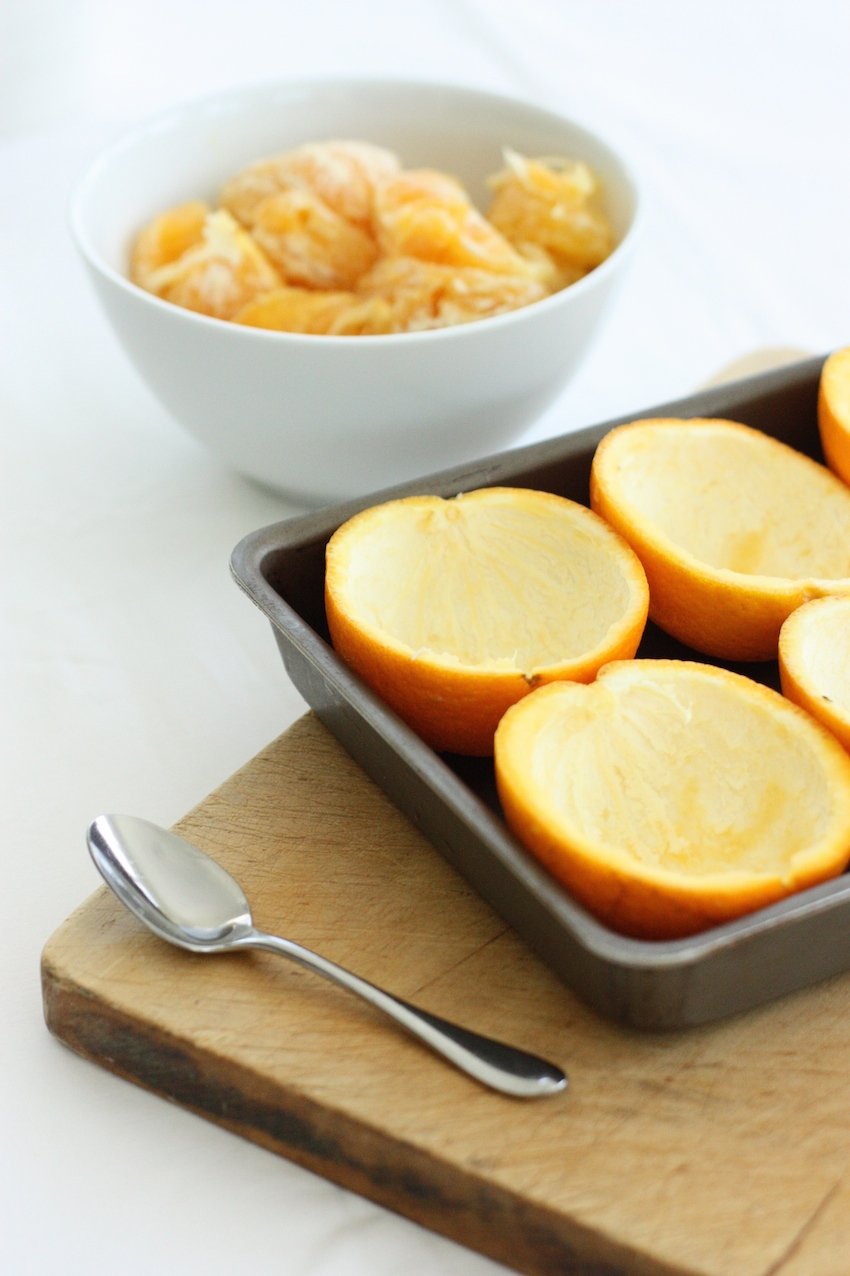
They're simple - halved oranges with the flesh scraped out and then filled with jelly. Allow them to set and then cut them in half again.
And why do these Jelly Boats stand the test of time?
- Because you eat them without a spoon.
- And because you can do this -
- And this -
- And maybe this -
- Oh, and they taste great too.
- And you can make them 2 or 3 days ahead of time and keep them in the fridge until party day.
I tend to make a few paper sails to adorn the Jelly Boats (wrapping paper + cocktail sticks + a glue stick) but that's more for my enjoyment, I suspect.
Now I'm not certain of this, but I imagine that a group of teenagers would go for these too - probably without the sails. Both teenage sons were desperate to 'sample' the boats as I made them and hovered around the table to scoop up any leftovers. And for MUCH older 'kids', I'm now wondering about Vodka Jelly Boats - but that's another story ...
There are a few (easy) secrets to success with these Jelly Boats -
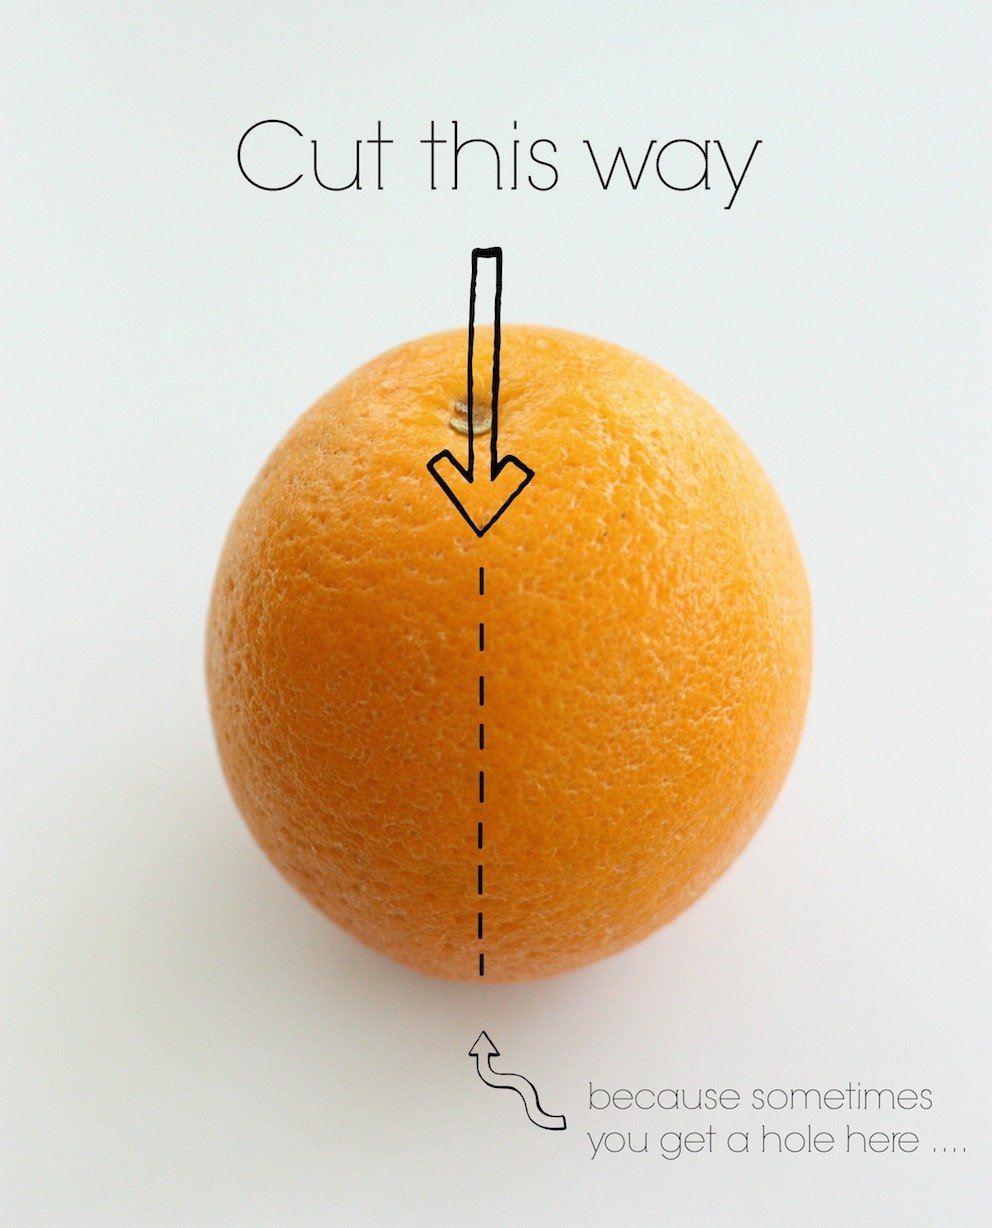
- When you cut the oranges in half, cut from top to bottom (ie cutting through the part where the fruit was attached to the tree). Depending on the variety of orange that you use, if you cut the oranges the other way, you sometimes end up with a hole in the skin at the base of the orange when you've scooped out the flesh. And that means jelly leaking everywhere.
- Make your jelly thicker than it says on the packet. I add half the amount of cold water that it says on the packet (e.g. if the instructions are to add 1 cup of boiling water (to dissolve the jelly) + 1 cup of cold water - just add ½ cup of cold water instead.)
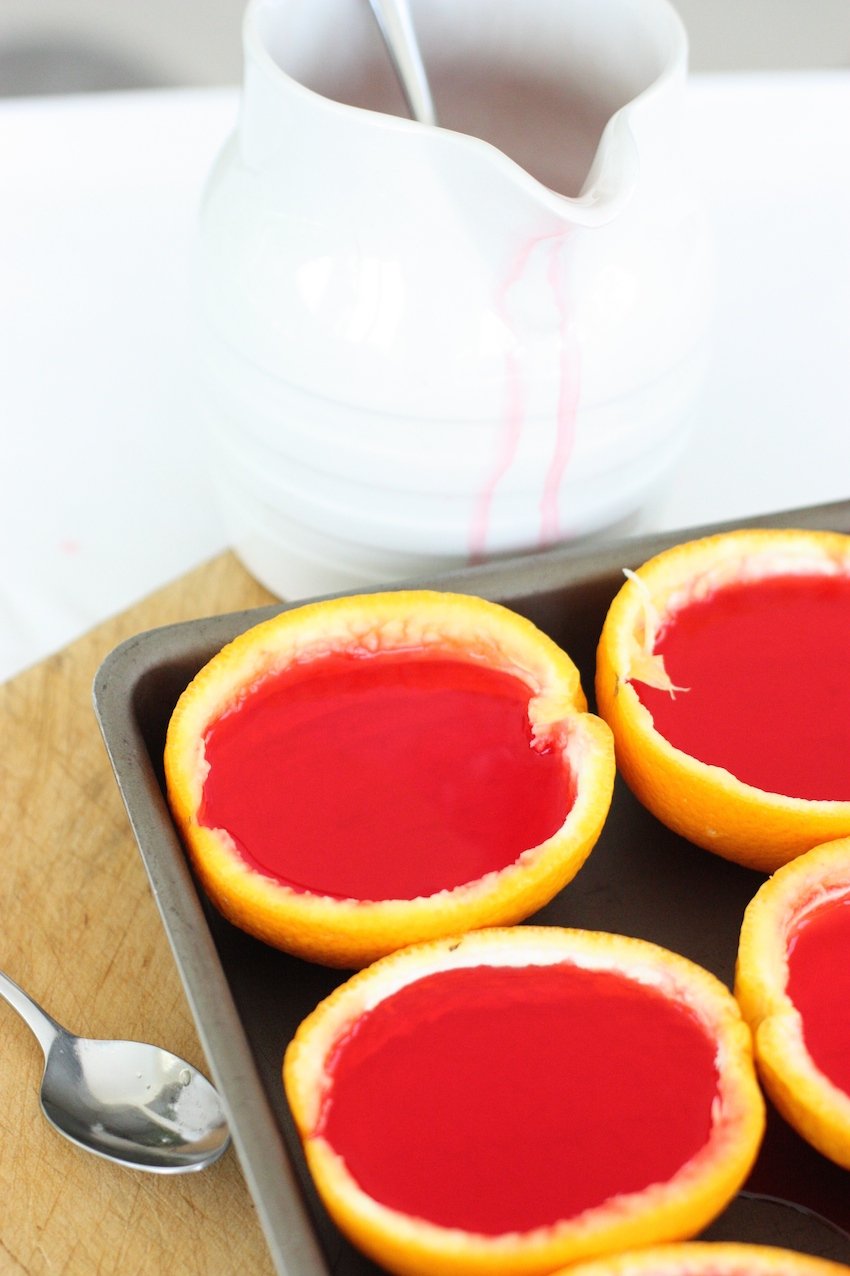
- Stand your orange shells in a smallish tin/dish with sides. You want the shells to fit pretty snuggly so that they don't topple over, so use an inverted cup or egg cup to fill any gaps in the tin/dish.
- From my vast experience of serving jelly boats, the red flavours always go down best.
So stand aside birthday party sandwiches and make way for the stars of the show - the Jelly Boats.
Oh and don't for one minute think that these can ONLY be rolled out as birthday party food - any occasion is perfect for a few Jelly Boats. Go on - make them your signature dish!
Jelly Boats
You can eat them with or without a spoon ... they provide heaps of photo potential and the kids love them. Young and old and very old.
- Prep Time: 30 mins
- Total Time: 30 mins
- Yield: 12 1x
- Category: Dessert
- Method: Fridge
- Cuisine: British
Ingredients
- 3 medium sized oranges
- 1 packet jelly
Instructions
- Cut the oranges in half from top to bottom (see tips) and scoop out the flesh using a teaspoon.
- Stand your orange shells in a smallish tin/dish with sides. You want the shells to fit pretty snuggly so that they don't topple over, so use an inverted cup or egg cup to fill any gaps in the tin/dish.
- Make your jelly thicker than it says on the packet. I add half the amount of cold water that it says on the packet (e.g. if the instructions are to add 1 cup of boiling water (to dissolve the jelly) + 1 cup of cold water - just add ½ cup of cold water instead.) Now carefully pour the liquid jelly into the shells - it's easiest if it is in a jug.
- Make sure the shells are full to the brim and leave them in the fridge for a few hours to set.
- When the shells are set, use a sharp knife to cut them in half again and decorate (if you wish) with paper sails (made with wrapping paper + cocktail sticks + a glue stick).
Notes
Allow time for the jelly to set - you will probably need a few hours.
Keywords: birthday party, celebration, children


